In summary:
- A safety inspection is not just a checklist; it’s a financial decision point based on the principle of « immediate threat. »
- Structural rust perforation is an automatic failure, whereas surface rust is not. Understanding the difference is critical.
- A Check Engine Light for emissions often won’t fail a safety inspection, but an exhaust leak will due to carbon monoxide risk.
- Getting a Safety Standards Certificate too early is a financial risk, as its validity is short (e.g., 36 days in Ontario).
- For high-cost repairs, trading in or selling a vehicle « as-is » can be a more financially sound decision than certifying it.
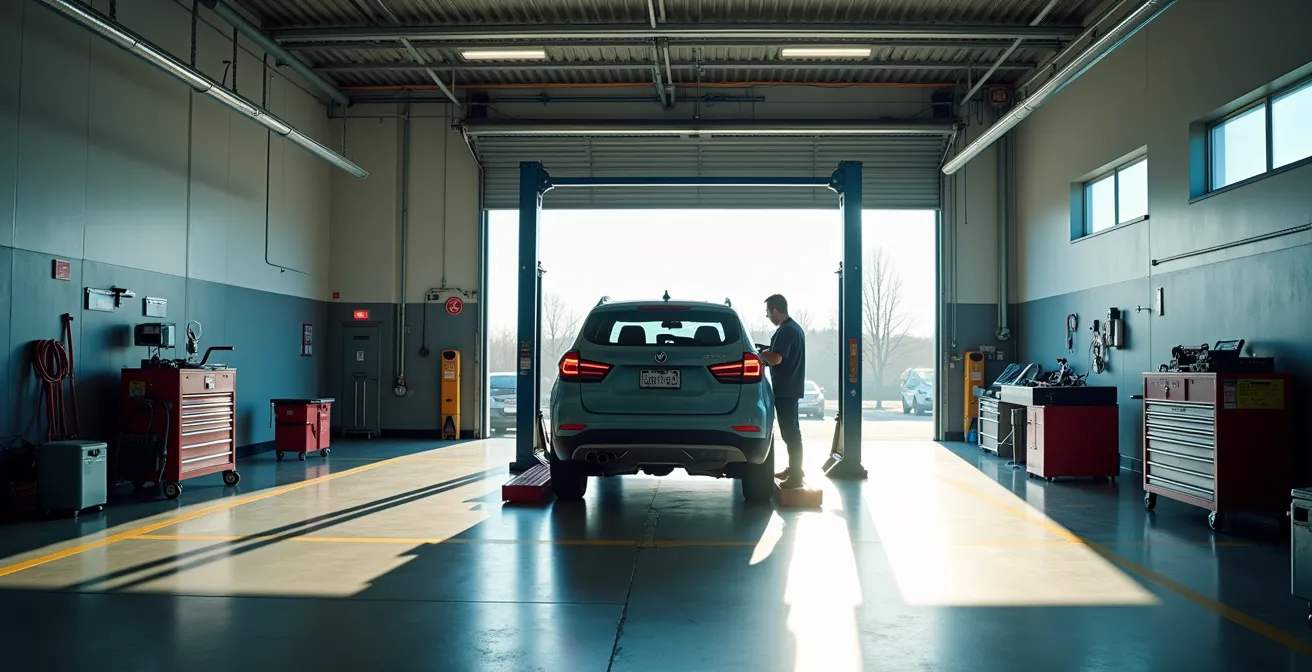
When selling a used vehicle in Canada, the Safety Standards Certificate (SSC) is more than just a piece of paper; it’s the critical gateway to transferring ownership. For a private seller, the inspection process can feel like a high-stakes gamble. You pay an inspection fee, but what if the car fails? Suddenly, you’re faced with unexpected, and often expensive, repair bills that erode or even eliminate your profit from the sale. Many sellers focus on the obvious checks, like making sure the lights work and the tires have some tread, but this superficial approach misses the core of what a licensed mechanic is trained to find.
The common advice is often too generic. It tells you to « check your brakes » but not that a specific measurement like brake lining thickness below 1.6mm is an instant failure. It warns about rust but fails to explain the crucial difference between a cosmetic blemish and a structural perforation that deems a vehicle unsafe for the road. This guide is different. It is written from the perspective of a licensed mechanic, focusing on the regulatory standards and the « why » behind each inspection point. My goal is to move beyond the simple checklist and frame the safety inspection as a strategic, financial decision point.
We will dissect the most common and misunderstood reasons for failure, from the nuances of window tint legality to the critical distinction between a Check Engine Light and a genuine safety hazard. You will learn how to perform a « pre-inspection triage » to identify deal-breaking issues yourself, understand the financial tipping point where certifying a car is no longer worth it, and discover the correct legal procedures for selling a vehicle that cannot be certified. This is your manual for navigating the mandatory provincial safety check system with confidence, minimizing financial risk and maximizing the value of your vehicle.
This comprehensive guide details the critical aspects of the vehicle safety inspection process across Canada. The following sections break down exactly what mechanics look for, helping you prepare for and understand the outcome of your vehicle’s certification.
Summary: A Mechanic’s Guide to Canadian Safety Inspections
- The top 3 reasons cars fail safety inspections in Ontario and Quebec
- Is your window tint legal for a safety inspection?
- Why a « Check Engine » light might not fail a safety, but an exhaust leak will?
- When does body rust become a structural safety failure?
- Why getting a safety certificate too early can waste your money?
- How to import a vehicle into Canada without getting stuck at customs?
- When to trade in your luxury car to minimize the depreciation hit?
- How to Dispose of an Old Car in Canada Responsibly and Legally?
The top 3 reasons cars fail safety inspections in Ontario and Quebec
In my experience, vehicle owners are often surprised by what causes a safety inspection failure. It’s rarely a single, catastrophic issue. More often, it’s a series of problems stemming from normal wear and tear that have been overlooked. The three most common areas that lead to a « FAIL » on an inspection report are consistently the brake system, tires, and structural integrity due to rust. These are the components that are directly responsible for vehicle control and occupant protection, so they are scrutinized with zero tolerance for deviation from the standard.
Brakes are the number one culprit. A driver may feel their brakes are « fine, » but our inspection is based on precise measurements, not feeling. The most common failures are related to brakes, with data showing that brake-shoe lining less than 1.6mm is an automatic fail. Likewise, tire tread depth must be at least 2mm (or 2.8/32″) across the entire width of the tire. Any bald spots, sidewall damage, or visible cords mean the vehicle is not leaving the shop with a certificate. Finally, rust is a major issue, particularly in the provinces of Ontario and Quebec where road salt is used heavily. I will cover this in more detail later, but any perforation in the frame or floor pan is a non-negotiable failure.
To avoid the shock of a failed inspection, it is imperative that you, the seller, conduct a rigorous pre-inspection of your own. Thinking like a mechanic before you go to one can save you time, money, and negotiation headaches. The following checklist outlines a systematic approach to auditing your vehicle against the core tenets of a safety inspection.
Your 5-Step Pre-Inspection Audit Plan
- Key Systems Check: Systematically inspect all critical safety systems. This includes brakes (fluid level, pad/shoe thickness if visible), all exterior lights (headlights, signals, brake lights), steering (check for excessive play), and suspension (listen for noises, check for leaks).
- Document Collection: Gather your vehicle’s ownership/title and any available service records. These records can sometimes provide insight into recurring issues or recent major repairs that an inspector will note.
- Standards Cross-Check: Familiarize yourself with the basic pass/fail criteria. Your tire tread must be over 2mm, your windshield must not have cracks in the driver’s field of vision, and all seatbelts must latch and retract properly.
- High-Failure Items Audit: Pay special attention to the most common failure points. Use a flashlight to inspect the undercarriage for rust perforation, especially on frame rails and rocker panels. Check your exhaust system for audible leaks.
- Rectification Plan: Based on your audit, create a realistic, prioritized list of necessary repairs. Get quotes for these repairs before the official inspection to understand the potential costs and decide if certifying the vehicle is financially viable.
By treating the safety inspection not as a mere formality but as a technical audit, you can anticipate the outcome and make an informed decision about your vehicle before spending a dollar on the official certification process.
Is your window tint legal for a safety inspection?
Window tint is a common modification that can unexpectedly cause a safety inspection failure. The rules are not about aesthetics; they are based on a specific, measurable standard called Visible Light Transmission (VLT). This measures the percentage of light that is allowed to pass through the window and tint film. If the tint is too dark on critical windows, it is considered a safety hazard because it can impair the driver’s visibility, especially at night or in poor weather conditions. It also prevents law enforcement from being able to see into the vehicle, which is a secondary safety concern.
During an inspection, a licensed mechanic uses a calibrated VLT meter to measure the tint on the front side windows (driver and passenger) and the front windshield. Aftermarket tint is almost universally forbidden on the front windshield below the AS-1 line (a mark designated by the manufacturer, usually about 6 inches from the top). For the front side windows, most provinces have a strict limit. This illustration shows how a VLT meter is used to get a precise reading.
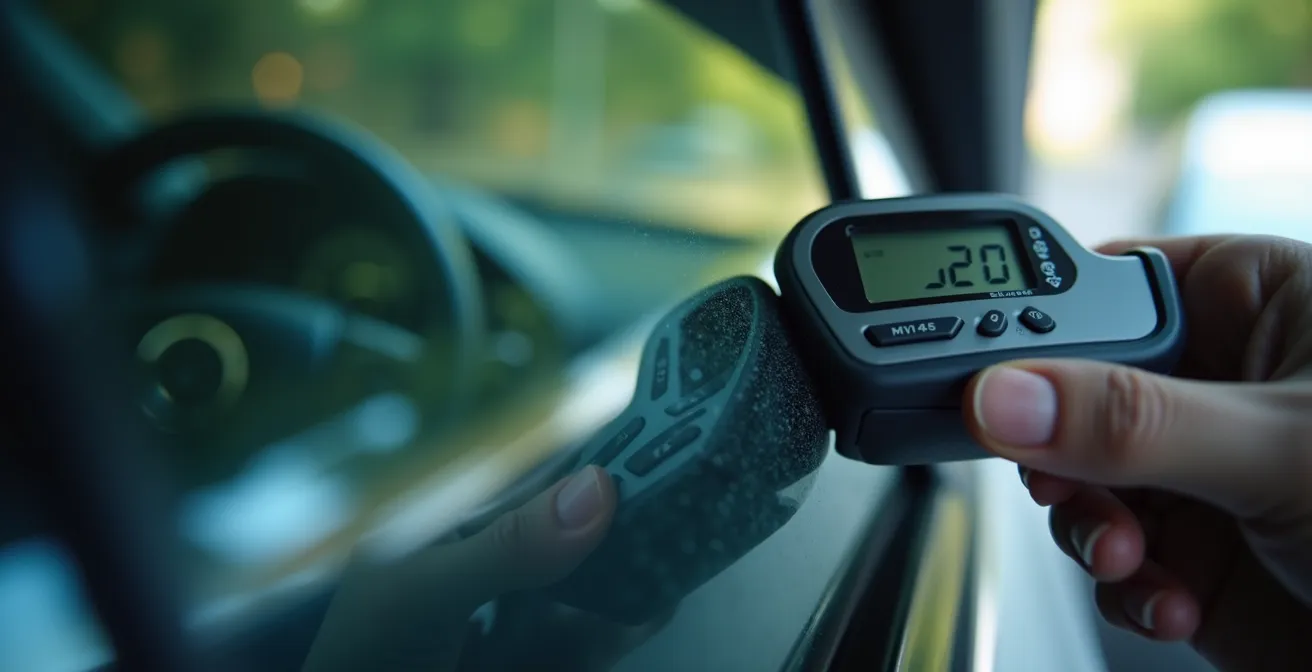
The specific VLT requirements are set at the provincial level, but there is a great deal of harmony across the country on this particular standard. A reading below the legal limit on these windows is an automatic fail, and the only remedy is the complete removal of the illegal tint film, which can be a costly and time-consuming process. The table below outlines the VLT requirements for front windows in several major Canadian provinces.
The following table, based on standards like those from the Ontario Ministry of Transportation, shows a consistent approach across Canada for front window tinting.
| Province | Front Windshield | Front Side Windows | Rear Windows |
|---|---|---|---|
| Ontario | No tint allowed (except top 6 inches) | 70% VLT minimum | No restriction |
| Quebec | No tint allowed (except top 15cm) | 70% VLT minimum | No restriction |
| British Columbia | No tint allowed (except top 7.5cm) | No film permitted | No restriction |
| Alberta | No tint allowed | No tint allowed | No restriction |
It’s important to note that while there are generally no restrictions on the rear side and back windows, you must have two functional exterior side mirrors if the rear window is tinted. If your vehicle has aftermarket tint, it’s wise to have it checked at a tint shop before your official safety inspection.
Why a « Check Engine » light might not fail a safety, but an exhaust leak will?
This is one of the most significant points of confusion for vehicle owners, largely due to the legacy of past emissions testing programs like Ontario’s « Drive Clean. » Under that program, an illuminated Check Engine Light (CEL) was an automatic failure. However, a standard provincial safety inspection operates on a different principle: the « immediate threat » doctrine. A safety inspection is designed to identify and fail components that pose a direct and immediate danger to the occupants of the vehicle or to other users of the road.
A CEL often indicates an issue with the engine’s emissions control system—for example, a faulty oxygen sensor or a loose gas cap. While these issues affect the vehicle’s environmental performance and long-term « health, » they do not typically represent an immediate safety threat. Therefore, in most provinces, a CEL itself is not a reason for a safety inspection failure. The critical exception is if the CEL is on due to a fault in a safety-related system, such as the Anti-lock Braking System (ABS) or airbag system (SRS). In those cases, the light indicates a direct failure of a safety component, and the vehicle will fail.
Case Study: The Drive Clean Program’s Legacy
The confusion surrounding the Check Engine Light is a direct result of Ontario’s now-defunct Drive Clean emissions program. For years, drivers were conditioned to believe a CEL was a major failure. Today, under the standard safety inspection, the focus has shifted entirely to immediate threats. An exhaust leak, for instance, is a critical safety failure because it can allow deadly, odorless carbon monoxide gas to enter the passenger cabin. This poses a clear and immediate threat to occupants. This distinction is vital: the safety inspection targets immediate danger, not the vehicle’s long-term powertrain health as the emissions test did.
For sellers, it’s wise to scan the vehicle with a cheap OBD2 scanner before the inspection to understand why the light is on. For buyers, bringing a scanner to a viewing is a non-negotiable step to uncover potentially hidden issues. A seller might have just cleared the codes to hide a problem, but a good scanner can often detect if codes were recently erased.
Ultimately, the rule is simple: if a fault compromises the ability to control the vehicle or protect its occupants in a crash, it’s a safety failure. If it primarily affects engine performance or emissions, it likely is not.
When does body rust become a structural safety failure?
In the « Canadian Rust Belt »—primarily Ontario, Quebec, and the Maritime provinces—road salt makes rust the arch-nemesis of any vehicle. Owners often ask if the rust on their car will cause it to fail a safety inspection. The answer depends entirely on one crucial distinction: is it cosmetic surface rust or structural perforation? A mechanic is trained to identify where the rust is located and how deep it goes. Surface rust on a door panel or fender is ugly, but it doesn’t compromise the vehicle’s ability to protect you in a crash.
Structural rust is a different matter entirely. Any rust that creates a hole (perforation) in a load-bearing part of the vehicle’s unibody or frame is an automatic failure. These components are engineered to absorb and distribute impact forces during a collision. If they are weakened by rust, the vehicle is no longer safe. Key areas we inspect for structural rust include:
- Frame rails (the main supports running the length of the vehicle)
- Rocker panels (the metal panels below the doors)
- Suspension mounting points
- The floor pan (especially under the driver’s and passenger’s feet)
To determine the severity of rust, mechanics perform what’s known as the « tap test. » This involves using a small hammer or the handle of a screwdriver to tap on rusted areas. If the tool makes a solid « thud, » the metal underneath is likely sound. If it makes a « crunch » or, in the worst-case scenario, goes right through the metal, it’s a structural failure. As noted by inspection centers across the Canadian Rust Belt, inspectors have significantly lower tolerance for rust in these regions precisely because its effects are so widespread and destructive.

Certain vehicles have known « hot spots » for structural rust, such as the rocker panels on older Honda Civics or the subframes on some Mazda models. A thorough undercarriage inspection, as shown here, is a non-negotiable part of any legitimate safety check.
If you see bubbling paint or surface rust on a non-structural panel like a fender, it will likely pass. If you can see, or create, a hole in the vehicle’s frame or floor with moderate pressure, you should anticipate a failure and a potentially expensive repair bill.
Why getting a safety certificate too early can waste your money?
One of the most common and costly mistakes a private seller can make is rushing to get a Safety Standards Certificate (SSC) before they even have a serious buyer. While advertising a car as « certified » is a strong selling point, the certificate has a surprisingly short lifespan. This creates what I call « certificate timing risk. » If you get the car certified and it takes you longer than expected to sell, the certificate can expire, forcing you to pay for a second full inspection.
In Ontario, for example, an SSC is only valid for 36 days. This is a very narrow window to find a buyer, negotiate a price, and have them complete the ownership transfer at a ServiceOntario centre. If the 37th day passes, your certificate is worthless, and you are back at square one. While the validity period varies by province, the principle remains the same: the clock starts ticking the moment the certificate is issued.
This table illustrates the time-sensitive nature of safety certificates in Canada, highlighting why timing is a critical strategic element for any private seller.
| Province | Validity Period | Key Requirement |
|---|---|---|
| Ontario | 36 days | Must be valid at time of registration |
| Manitoba | 45 days | Required at time of sale for most vehicles |
| Saskatchewan | 90 days | Required for vehicles from out of province |
| Quebec | Varies by situation | Not always required for private sales within QC |
Strategy: The « Conditional Safety » Sale
To completely de-risk this situation, savvy sellers in markets like Ontario are adopting a « Conditional Safety » strategy. This involves listing the car for sale without a current certificate. You negotiate the price with a potential buyer and take a deposit, with the final sale being conditional on the vehicle passing a safety inspection. You then take the car for the inspection. This approach ensures you only spend the inspection fee once you have a committed buyer and a sale is imminent. It provides the buyer with the confidence of a freshly passed inspection while protecting the seller from the financial risk of an expiring certificate.
The best practice is to be prepared to get the inspection done quickly once you have a deal in place, rather than having it done preemptively.
How to import a vehicle into Canada without getting stuck at customs?
Importing a vehicle into Canada, especially from the United States, involves a two-stage compliance process that many people misunderstand. Successfully navigating this process means knowing the difference between the federal requirements at the border and the subsequent provincial safety inspection. Getting through the first stage does not guarantee you will pass the second.
At the border, your vehicle must meet Canadian federal standards, which are managed by the Registrar of Imported Vehicles (RIV) program. This inspection primarily ensures the vehicle has features required in Canada, such as daytime running lights and metric labels for the speedometer. Once the vehicle passes the RIV inspection and is officially imported, it must then pass a standard safety inspection in the province where it will be registered. This is where many importers get into trouble, as provincial standards can be stricter or simply different from the federal ones.
The Alberta Import Trap
Alberta’s Out-of-Province Vehicle Inspection is notoriously one of the most rigorous in the country. Many vehicles imported from the U.S. that would easily pass an inspection in Ontario or B.C. can fail in Alberta. Common failure points include specific requirements for bumper standards, body integrity, and even minor component specifications that differ from other provinces. Importers must understand that RIV approval is merely permission to bring the car into the country; it is not a certification of roadworthiness at the provincial level. Researching the specific requirements of your destination province *before* you buy and ship the car is the single most important step to avoid costly surprises.
To ensure a smooth importation process, a strategic approach is essential. Following a clear checklist can help you avoid getting stuck with a vehicle that you legally imported but cannot legally drive. Based on federal guidelines from sources like Transport Canada, here are the key steps:
- Step 1: Confirm your vehicle is on the RIV’s list of admissible vehicles from the U.S.
- Step 2: Research your destination province’s specific safety standards (e.g., Alberta’s Out-of-Province inspection, Quebec’s SAAQ requirements).
- Step 3: Identify and budget for common US-to-Canada modifications, like adding daytime running lights.
- Step 4: Complete the RIV inspection at a designated Canadian Tire location after crossing the border.
- Step 5: Immediately schedule your provincial safety inspection, understanding it will be more detailed than the RIV check.
By preparing for both the federal and provincial hurdles, you can budget accurately and avoid the nightmare scenario of having an unplateable vehicle sitting in your driveway.
When to trade in your luxury car to minimize the depreciation hit?
For owners of aging luxury vehicles, particularly German brands like Mercedes-Benz, BMW, and Audi, the mandatory safety inspection often represents a critical financial tipping point. These cars are engineered with complex and expensive systems, such as air suspension, advanced electronics, and sophisticated braking components. While these features provide a superior driving experience when new, they become a significant financial liability as the car ages. A single failure of one of these systems can result in a repair bill that exceeds the value you might gain from a private sale.
This is where the decision to certify for a private sale versus trading the vehicle in « as-is » becomes a purely financial calculation. A dealer has the advantage of in-house service bays and wholesale parts pricing, allowing them to perform certification repairs for a fraction of what a private individual would pay. They can absorb a multi-thousand-dollar repair bill and still profit from the vehicle’s resale.
Scenario: The $5,000 Air Suspension Failure
Consider an 8-year-old Mercedes-Benz S-Class with a failed air suspension system—a common issue. The private sale value, if certified, might be $20,000. However, the cost to replace the air suspension components at a retail repair shop could easily be $5,000 or more. As a seller, you are now faced with spending $5,000 to hopefully make $20,000. A dealer, however, might offer you $15,000 for the car as a trade-in, knowing they can perform the repair for much less. In this scenario, accepting the $15,000 trade-in is the financially superior move, as you avoid the risk and upfront cost of the repair.
Industry experts advise viewing the safety inspection through this financial lens. As highlighted in a report from the Ontario Vehicle Dealers Association, you should:
Frame the safety inspection as a financial tipping point – if repair costs plus remaining depreciation exceed the trade-in offer, trading in ‘as-is’ becomes the smarter financial move.
– Ontario Vehicle Dealers Association, Luxury Vehicle Trade-in Analysis Report 2024
Before deciding to certify an older luxury car, always get a quote for any potential repairs. If the cost of certification comes close to or exceeds the difference between your expected private sale price and a dealer’s trade-in offer, the logical choice is to let the dealer handle it.
Key Takeaways
- The core principle of a safety inspection is the « immediate threat » doctrine; it targets active dangers (bad brakes, exhaust leaks, structural rust), not long-term engine health (most Check Engine Lights).
- The safety inspection must be treated as a financial tipping point. If the cost to certify a vehicle exceeds its market value increase, selling it « as-is » or scrapping it is the more logical financial decision.
- Timing is everything. A safety certificate has a short validity period (e.g., 36 days in Ontario), so getting one too early before securing a buyer is a significant and unnecessary financial risk.
How to Dispose of an Old Car in Canada Responsibly and Legally?
There comes a time in every car’s life when the cost of keeping it on the road outweighs its value. This moment is often triggered by a failed safety inspection revealing a major repair bill for issues like a rusted-out frame or a failed transmission. When repair costs to pass a safety inspection exceed the car’s private sale value, it has reached the end of its life as a viable vehicle. At this point, your responsibility shifts from selling the car to disposing of it legally and responsibly.
Simply abandoning the vehicle is illegal and will lead to fines and liability. The correct procedure involves legally transferring the ownership to a new owner—whether that’s a hobbyist buying it for parts or a licensed scrapyard. In Ontario, for instance, this requires a specific step during the ownership transfer process. On the back of the ownership document (the « vehicle portion »), you must check the box labeled « UNFIT. » This brands the vehicle’s title, officially declaring it as not roadworthy. The new owner will not be able to put license plates on it until it is repaired and passes a safety inspection.
When selling to a private individual for parts, it is crucial to create a bill of sale that explicitly states the vehicle is being sold « as-is, for parts only » to protect yourself from future liability. An even safer and often easier option is to use a reputable car recycling program like Car Heaven or Retire Your Ride. These programs, often associated with the Automotive Recyclers of Canada, typically offer free towing and may provide a tax receipt for the value of your donated vehicle. They ensure the vehicle is depolluted in an environmentally sound manner and that the ownership is legally transferred out of your name.
If you choose to sell to a scrapyard directly, here are the steps to follow:
- Call several local yards to get quotes. Prices are typically based on the vehicle’s weight and range from $200-$500.
- Check the « UNFIT » box on your ownership and sign it over to the scrapyard representative.
- Get a bill of sale or receipt confirming the transaction.
- Keep the license plate portion of your ownership and visit a provincial service centre to report the vehicle as sold/scrapped. This is a critical step to remove your liability.
By handling the disposal process correctly, you ensure a clean legal break from the vehicle and contribute to a responsible recycling ecosystem. This is the final, essential step in the vehicle ownership lifecycle.