Most vehicle owners assume a seat belt functions perfectly until it obviously breaks. This is a dangerously false assumption. From an inspector’s standpoint, a seat belt is a complex mechanical system that degrades over time due to environmental factors and use. Minor issues like slow retraction or slight fraying are not inconveniences; they are critical warnings of imminent system failure that cannot be ignored.
As a vehicle owner in Canada, you likely take pride in your safety record. You buckle up on every trip; after all, 96% of Canadians wear seat belts, one of the highest rates in the world. You see the belt, you hear the click, and you assume you are protected. This assumption is the single most dangerous blind spot in vehicle safety today. A seat belt is not a simple, indestructible strap. It is a precision-engineered safety system—comprising the webbing, retractor, pretensioner, and anchor points—that is under constant assault from UV rays, friction, and, particularly in Canada, corrosive road salt and grime.
The common belief is that a belt is either working or it’s visibly broken. The reality is that its performance degrades silently. The slow retraction you dismiss as an annoyance is actually a symptom of a contaminated mechanism. The cheap pet harness you bought online offers the illusion of safety but lacks any of the regulatory oversight required for child seats. These are not minor details; they are critical points of failure in a system you rely on to save your life.
This guide abandons platitudes. We will not simply « remind » you to be safe. Instead, we will adopt the uncompromising perspective of a safety inspector. The following analysis dissects the critical failure points of your vehicle’s restraint systems, from the driver’s seat to the back bench. The goal is to replace assumption with a protocol of rigorous, non-negotiable inspection. Your life, and the lives of your passengers, depend on the integrity of this system.
This inspection protocol is broken down into critical areas of examination. Each section details a common point of failure and the non-negotiable standards required to ensure the system’s integrity.
Summary: Seat Belts: The Forgotten Safety System That Demands Your Attention
- How to clean a slow-retracting belt without replacing the mechanism?
- Why your $20 pet seat belt might fail instantly in a crash?
- Did your seat belt lock up in a minor bump? Why it needs replacing now
- When does a little fuzz on the belt strap become a safety failure?
- Where to mount an emergency cutter so you can actually reach it?
- Is the latch system actually safer than using the seat belt?
- How sitting too close to the wheel causes injury during deployment?
- Beyond the Seat: Keeping Children Safe in Canadian Winters
How to clean a slow-retracting belt without replacing the mechanism?
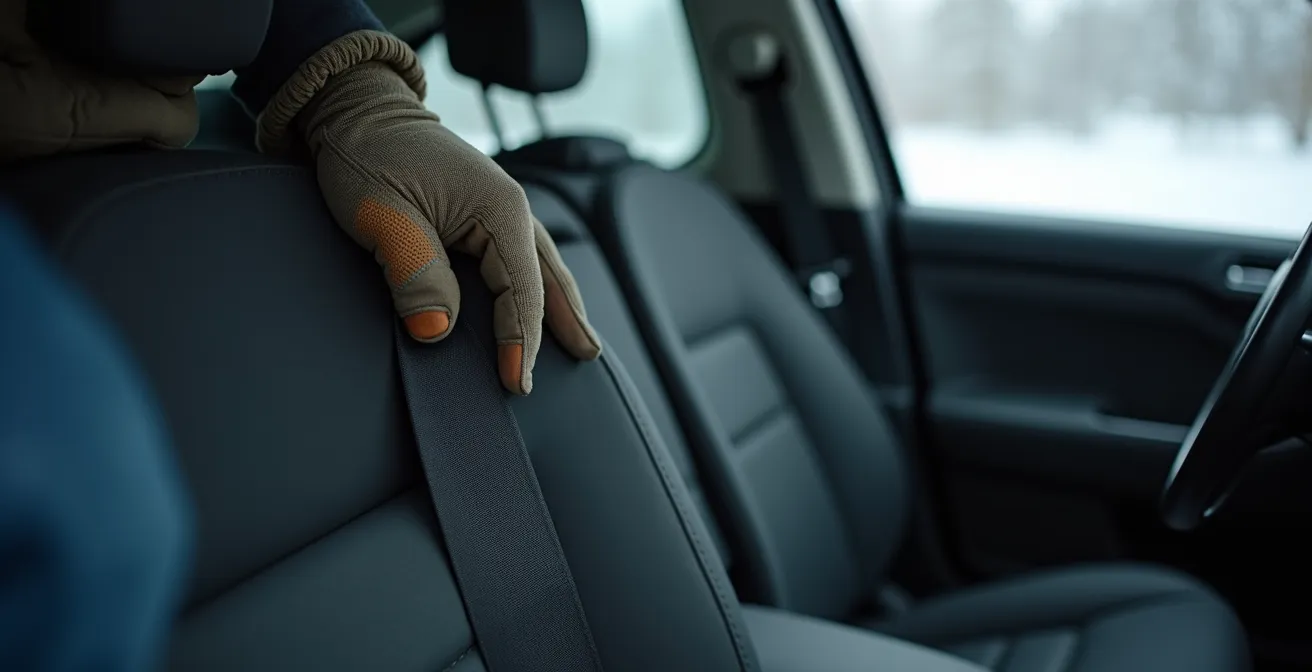
A seat belt that retracts slowly or requires manual feeding is not an annoyance; it is a critical system malfunction. This sluggishness is almost always caused by an accumulation of dirt, grime, and crystallized road salt on the webbing and within the B-pillar guide loop. This contamination increases friction, forcing the retractor spring to work harder until it can no longer overcome the resistance. In Canadian winter conditions, this buildup can freeze, making the belt stiff and further compromising its function.
Cleaning the belt is not a cosmetic task but an essential piece of preventative maintenance. It restores the system’s intended performance and prevents premature wear on the internal mechanism. The process must be done correctly, as using the wrong chemicals can degrade the webbing’s synthetic fibres, weakening its tensile strength.
Follow this procedure to restore retraction speed and maintain system integrity:
- Extend and Wipe: Fully extend the seat belt and secure it with a clamp at the pillar. Use a microfiber cloth dampened with a mixture of warm water and mild soap (like a dish detergent). Aggressively scrub both sides of the webbing. Avoid harsh chemicals, bleach, or all-purpose cleaners which can become aggressive in sub-zero temperatures and damage the fibres.
- Focus on the Guide Loop: The plastic guide loop on the B-pillar is where the majority of road salt and slush crystallize. Use a soft-bristled brush to meticulously dislodge any built-up grime from this critical friction point.
- Rinse Thoroughly: Using a new cloth with only warm water, wipe down the belt multiple times to remove all soap residue. Leftover soap can freeze, causing brittleness, or attract more dirt.
- Air Dry Completely: The belt must be allowed to air dry fully while still extended. Retracting a damp belt will introduce moisture into the sealed retractor mechanism, promoting mold, mildew, and internal corrosion. This step may take several hours.
- Test Retraction: Once completely dry, release the clamp and test the retraction speed. If it remains slow after a thorough cleaning, the issue is likely with the internal retractor spring. At this point, you must consult a Transport Canada certified technician for inspection and potential replacement.
Why your $20 pet seat belt might fail instantly in a crash?
The marketplace for pet travel restraints is a minefield of false security. You see a product advertised as a « pet seat belt » and assume it has undergone some form of safety testing. This is a catastrophic misconception. The core issue is a complete lack of regulation. As Transport Canada’s own standards document makes clear:
Unlike child seats, which are rigorously regulated by Transport Canada’s CMVSS, there are zero federal standards for pet restraints.
– Transport Canada, Federal Motor Vehicle Safety Standards
This regulatory vacuum means that a cheap, $20 harness is often constructed with substandard plastic buckles, thin webbing, and weak stitching that can disintegrate under the immense forces of a collision. An unsecured 75-pound dog in a 50 km/h crash can exert approximately 3,750 pounds of force. A non-certified harness will not withstand this; the stitching will rip, the plastic will shatter, and the animal becomes a deadly projectile within the cabin, posing a lethal threat to itself and all human occupants.
The visual evidence from crash simulations is damning. An improperly restrained pet is subjected to violent, uncontrolled movement, leading to severe or fatal injury. True safety requires a product designed and tested to an objective standard. While no government standard exists, some manufacturers have taken the initiative to self-regulate by testing to established child safety seat protocols.
Case Study: The Standard for Pet Safety
To demonstrate what constitutes a safe restraint, consider the case of Sleepypod. They were the first manufacturer to voluntarily test their pet harnesses at facilities certified for U.S. Federal Motor Vehicle Safety Standard No. 213 and Canada Motor Vehicle Safety Standard No. 213—the very standards for child restraints. In tests using a 75-pound crash test dog dummy, their Clickit Terrain harness successfully kept the dummy on the test bench and controlled its rotation during impact. This is the difference between a safety device and a deadly piece of costume. Your responsibility as a pet owner is to seek out products that can provide proof of this level of dynamic crash testing.
Did your seat belt lock up in a minor bump? Why it needs replacing now
If your seat belt has locked and will not extend or retract after even a minor collision—a parking lot bump, a hard curb strike, or a minor fender bender—it is not « stuck. » It has done its job and is now permanently disabled. This is a zero-tolerance failure. The device that locked is the seat belt pretensioner, a pyrotechnic charge connected to the vehicle’s Supplemental Restraint System (SRS).
When the SRS sensors detect a sudden deceleration characteristic of a crash, they send a signal that fires this explosive charge. The charge rapidly retracts the belt by several centimetres, pulling the occupant firmly into their seat an instant before the airbag deploys. This action eliminates slack and positions the body optimally to ride out the impact. Once fired, this single-use device is spent. It will not reset. Your seat belt is now nothing more than a limp strap with no life-saving capability.
Driving with a fired pretensioner is equivalent to driving with no seat belt at all. The airbag warning light on your dashboard is often, but not always, an indicator that this system has been activated. Replacement is not optional; it is mandatory for the vehicle to be considered roadworthy. Many Canadian repair services understand the urgency of this repair, with some Canadian seat belt repair services offering a 24-hour turnaround on rebuilding these critical components to OEM specifications. Do not delay this service.
Post-Accident Seat Belt Inspection Protocol
- Force Test: Pull the belt webbing sharply and firmly. If it will not extend, or if it extends but will not retract smoothly, consider the pretensioner fired and the unit compromised.
- Warning Light Audit: Check your dashboard for an active airbag or SRS warning light. Its presence is a definitive confirmation that the restraint system has been activated and requires professional service.
- Webbing Inspection: Visually inspect the entire length of the belt webbing for signs of stretching, tearing, or localized burn marks near the retractor. The force of the pretensioner activation can damage the fabric itself.
- Insurance Notification: Immediately contact your insurance provider (e.g., Intact, Aviva, Desjardins). Pretensioner replacement is a mandatory part of any legitimate collision repair and is required for the vehicle to pass a safety certification.
- Certified Facility Inspection: Schedule an inspection with a Transport Canada certified repair facility. They will replace the fired components and issue a Structural Integrity Certificate, confirming the vehicle’s restraint system is fully functional.
When does a little fuzz on the belt strap become a safety failure?
Seat belt webbing is not just cloth; it is a meticulously woven fabric of high-tensile polyester or nylon fibres designed to stretch in a controlled manner during a crash, absorbing a significant amount of kinetic energy. « Fuzz » or fraying on the surface of this webbing is not a cosmetic issue. It is visible proof of broken fibres. Each broken fibre represents a reduction in the belt’s overall tensile strength and its ability to manage impact forces.
The question is not if this damage is a problem, but at what point it constitutes a safety failure. For this, we look to objective, non-negotiable standards. In Canada, the criteria are clear and strict, particularly within the context of vehicle certification.
Inspection Standard: The Ontario Safety Certificate Criterion
During the mandatory inspection for an Ontario Safety Standards Certificate, required for most vehicle ownership transfers, seat belts are subjected to intense scrutiny. According to ministry guidelines, any visible cut, burn, or area of fraying that exceeds 3mm in width at any point results in an automatic failure for the vehicle. This is not a guideline; it is a pass/fail metric. This standard is crucial in Canada’s large used vehicle market, where buyers must be vigilant. Beyond obvious cuts, inspectors specifically look for UV degradation from sun exposure, which makes fibres brittle, and wear patterns from the zippers on bulky winter parkas, which can create localized weak points that compromise the entire strap.
From an inspection standpoint, any visible damage to the webbing is cause for concern. Fraying indicates that the outer, protective weave has been compromised, exposing the core load-bearing fibres to increased abrasion and environmental damage. If you can pinch a loose tuft of fibres, or if you see a « run » similar to one in a stocking, the integrity of the belt is already in question. Do not wait for the damage to reach the 3mm failure point. A seat belt showing any sign of significant fraying, cuts, or discolouration from UV exposure should be replaced without hesitation.
Where to mount an emergency cutter so you can actually reach it?
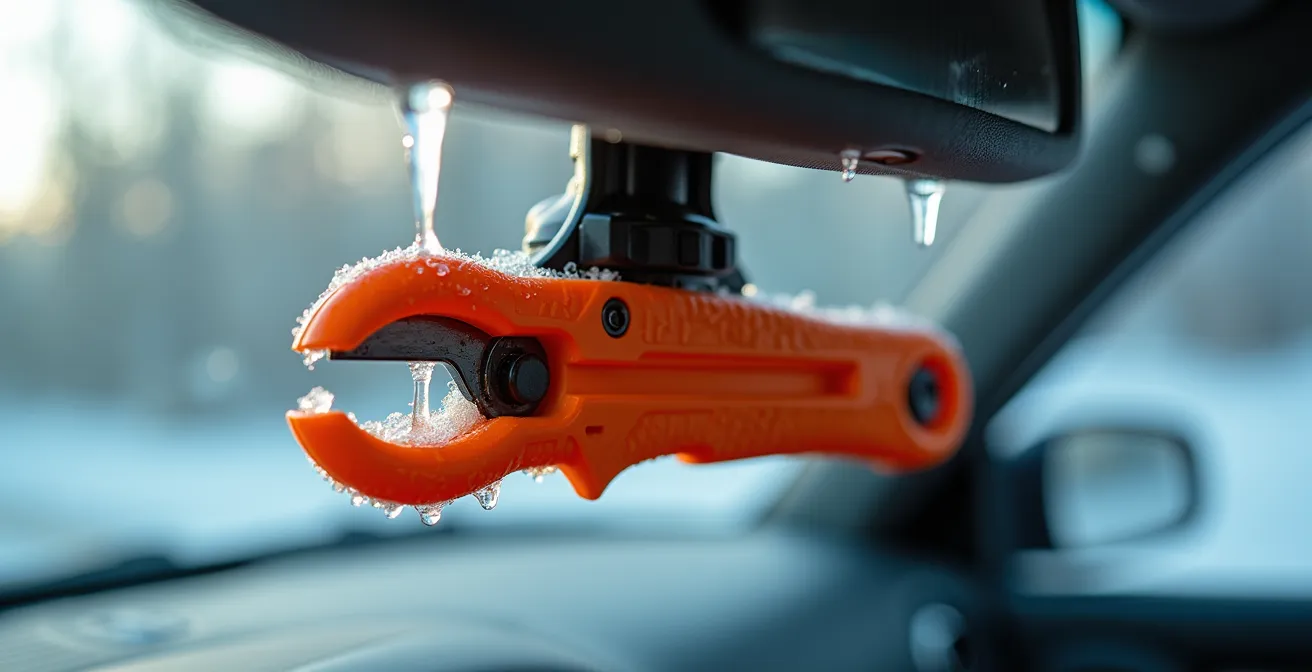
The final layer of your safety protocol is a contingency plan for when the primary systems fail or entrap you. A collision, a vehicle rollover into a snowy ditch, or an electrical failure can cause a seat belt mechanism to jam, trapping you inside the vehicle. In these scenarios, an emergency escape tool containing a seat belt cutter is not a gadget; it is a critical piece of survival equipment. In its winter driving guide, Transport Canada explicitly lists an « emergency seat belt cutter and window hammer » as part of a recommended emergency kit.
However, the tool is useless if you cannot reach it. Storing it in the glove box, a door pocket, or a center console bin is a critical error. In a rollover, you may be suspended upside down, pinned by the belt. A restrictive winter jacket can severely limit your range of motion. The contents of your glove box will be scattered throughout the cabin. The tool must be mounted in a location that remains accessible from a fixed and compromised position.
The placement must be deliberate and planned for a worst-case scenario. Based on accessibility studies and real-world-use cases, especially considering the limitations imposed by Canadian winter conditions, several mounting positions are deemed optimal.
- Visor Clip Mount: This is the premier location. It is accessible with minimal arm movement, even when inverted or wearing a bulky winter parka. Your muscle memory for reaching the visor is already established.
- Headrest Post Attachment: Securing the tool to the metal posts of your own headrest makes it reachable with a short, backward arm motion, requiring minimal torso movement.
- Secured Center Console Mount: This is only viable if the tool is mounted externally on the console’s side (e.g., with heavy-duty Velcro or a dedicated bracket), not stored loosely inside. It should be accessible to both driver and passenger.
- Keychain Tool: A small, effective cutter attached to your car keys ensures it is always with you. The `resqme` tool, for example, is designed for this purpose. When you turn off the ignition after a crash, the tool is in your hand.
The strategy should be redundancy. In the extreme cold of a Canadian winter, fumbling for a single tool is not an option. Placing multiple cutters in different, accessible locations (e.g., one on the driver’s visor, one on the passenger’s) is a professional approach to safety preparedness.
Is the latch system actually safer than using the seat belt?
For parents of young children, installing a car seat correctly is a source of significant anxiety. The choice between using the vehicle’s seat belt or the UAS/LATCH system (Universal Anchorage System / Lower Anchors and Tethers for Children) is a common point of confusion. From a purely technical standpoint, when installed correctly, both systems are equally safe. They are both designed to secure the child restraint to the vehicle frame and have been proven to be effective in crash tests.
The critical difference lies not in the systems themselves, but in the margin for human error. The UAS, which Transport Canada regulations show was mandated in Canadian vehicles from 2002 onwards, was specifically designed to be more intuitive and reduce the likelihood of installation mistakes. Securing a car seat with a vehicle seat belt often requires understanding how to engage the belt’s locking mechanism and using a locking clip, steps that are frequently missed by caregivers.
A car seat that is not secured tightly—with less than one inch of movement at the belt path—will not provide the intended protection. Because UAS installations have a statistically lower rate of user error, they are, in real-world practice, often safer. The following table breaks down the key differences based on Transport Canada guidelines.
| Installation Method | Safety Rating | Error Rate | Weight Limit | Pre-2002 Vehicles |
|---|---|---|---|---|
| UAS (Universal Anchorage System) | Equal when correct | Lower error rate | 65 lbs combined (child + seat) | Not available |
| Seat Belt with Locking Clip | Equal when correct | Higher error rate | No specific limit | Available |
| Seat Belt without Locking Clip | Potentially unsafe | Very high error rate | Not recommended | Common issue |
The final verdict is clear: if your vehicle is equipped with UAS and your child and car seat are within the 65-pound combined weight limit, using the UAS is the recommended method due to its simplicity and lower risk of a dangerously loose installation. Once the weight limit is exceeded, you must switch to a correct seat belt installation. For owners of pre-2002 vehicles, mastering the seat belt installation method is a non-negotiable safety skill.
How sitting too close to the wheel causes injury during deployment?
Proper seating position is not about comfort; it is a critical component of the SRS system’s design parameters. An airbag is not a soft pillow. It is a rapidly inflating device that deploys from the steering wheel at over 300 km/h. The system is engineered to protect an occupant who is correctly positioned in their seat. If you are sitting too close, your body is in the path of the airbag’s explosive deployment, which can cause severe or fatal injuries to the head, neck, and chest.
The standard for a safe distance is clear and non-negotiable. For this, we reference provincial safety guidelines that establish a specific minimum distance. The goal is to allow the airbag to fully inflate before your body makes contact with it.
The 25-Centimetre Rule: A Non-Negotiable Standard
Across Canada, driver education programs and safety bodies emphasize proper seating posture. The most critical metric is the distance between the driver’s chest and the centre of the steering wheel, where the airbag module is housed. Canadian safety guidelines recommend maintaining a minimum distance of 25 to 30 centimetres. This « 25-centimetre rule » is a fundamental principle of driver safety. This distance must be achieved while still being able to fully depress the brake pedal. This is particularly relevant given the diverse Canadian vehicle fleet; drivers of compact cars common in urban centres like Montreal must be diligent in seat adjustment, while those in full-size pickup trucks prevalent in the Prairies must often adjust seat height in addition to distance to maintain this safe zone due to different dashboard geometries.
To achieve this safe distance, adjust your seat as follows: slide the seat as far back as possible while still allowing your foot to pivot from the accelerator to the brake and apply full pressure. Then, adjust the seat back to an upright position—not a deep recline—so your shoulders are supported and your hands can comfortably hold the wheel at the 9 and 3 o’clock positions. If your steering wheel is adjustable, tilt it towards your chest, not your face. Adhering to this protocol ensures that in a collision, the seat belt restrains you while the airbag deploys into the space in front of you, creating a protective cushion as intended.
Key Takeaways
- A seat belt is a mechanical system; slow retraction is a sign of contamination and impending failure, not a mere annoyance.
- Most pet restraints sold in Canada are not safety tested. Seek out products with proven dynamic crash testing credentials.
- A locked seat belt after any impact means the single-use pretensioner has fired and must be replaced immediately. The system is no longer functional.
- Frayed webbing over 3mm wide is an automatic safety failure in provinces like Ontario. Any visible damage compromises the belt’s strength.
Beyond the Seat: Keeping Children Safe in Canadian Winters
The final and most critical point of inspection involves the most vulnerable passengers: children. While using a properly installed car seat is paramount—and proper use can reduce injury risk significantly—the unique conditions of a Canadian winter introduce a deadly variable: the bulky snowsuit. Many caregivers, with the best of intentions, strap their children in while they are wearing puffy winter coats. This is a catastrophic mistake.
A snowsuit is filled with air and soft insulation. When you tighten a car seat harness over a puffy jacket, you are not tightening it against the child’s body. You are tightening it against the jacket. In a crash, the immense forces will instantly compress all the air out of that jacket, creating a large gap between the child and the harness. This slack can be several inches wide, creating enough space for a child to be ejected from the car seat entirely. The harness, which you believed to be snug, becomes useless.
The « force multiplier » effect is at play here. The slack created by the coat allows the child’s body to accelerate and build momentum before being violently stopped by the harness, multiplying the forces exerted on their small frame and dramatically increasing the risk of severe spinal and internal injuries. The non-negotiable rule is: no puffy coats in the car seat.
To keep a child both warm and safe, follow this protocol: Dress the child in thin, warm layers (like fleece or wool). Place them in the car seat and ensure the harness is snug. You should not be able to pinch a horizontal fold of webbing at their collarbone. Once the child is securely buckled, you can place their winter coat on them backward over their arms or cover them with a thick blanket. This method keeps them warm without compromising the absolute integrity of the harness-to-body connection. This isn’t a suggestion; it’s a fundamental requirement of winter child passenger safety.
Your vehicle’s restraint system is only as strong as its weakest link. From the mechanical integrity of the retractor to the unregulated harness on your pet and the jacket on your child, every detail matters. Assumptions are not a safety feature. The only path to true safety is a protocol of rigorous, uncompromising, and continuous inspection. Your next step is to walk out to your vehicle and perform one.