Upgrading an older car isn’t about buying gadgets; it’s about making smart, integrated choices that are safe and reliable for Canadian conditions.
- Full head unit replacements offer a seamless, factory-like experience that standalone screens can’t match.
- Safety and legality must come first—especially concerning LED headlight conversions and airbag systems.
Recommendation: Prioritize upgrades that offer the best system integration and are professionally installed to withstand harsh Canadian winters and comply with local laws.
You love your car. It’s paid off, reliable, and you’ve shared some great road trips together. But let’s be real—the technology feels like a time capsule. You’re fumbling with aux cords, your phone is mounted on a flimsy vent clip, and you’re missing out on the seamless connectivity that new cars offer. The internet is flooded with advice, mostly pointing towards cheap Bluetooth FM transmitters or lists of standalone gadgets. Many owners wonder if it’s even worth upgrading an old car, or if they should just save for a new one.
But what if the key wasn’t just to add tech, but to integrate it? The real secret to making a 2010 vehicle feel like it belongs in 2024 is to choose upgrades that work together, enhance the car’s inherent qualities, and, most importantly, are safe and legal on Canadian roads. It’s about achieving an « OEM+ » feel—a driving experience that feels like it came from the factory, only better. This isn’t about turning your dash into a mess of wires and screens; it’s about thoughtful, value-driven modernization.
This guide, straight from an installer’s perspective, will walk you through the critical decisions you need to make. We’ll cut through the noise and focus on what truly makes a difference, from the core infotainment system to the small details that elevate your daily drive, all while keeping the unique challenges of the Canadian climate and regulations in mind.
To help you navigate these upgrades, this article breaks down the most important considerations. Below is a summary of the key areas we will explore to help you make informed, effective, and safe choices for your vehicle.
Summary: A Canadian Installer’s Guide to Smart Vehicle Tech Upgrades
- Head unit replacement vs stand-alone screens: Which is better?
- How $200 of insulation can make your economy car feel like a luxury sedan?
- When is it illegal to put LED bulbs in halogen reflector housings?
- Can you safely swap a steering wheel without disabling the airbag?
- Plug-and-play vs wire splicing: Which remote starter is safer?
- Why insuring a 10-year-old Civic can cost more than a new SUV?
- Decibel Limits: How police are testing loud exhausts in cities?
- SpotAngels vs GreenP: Which app prevents more tickets?
Head Unit Replacement vs Stand-Alone Screens: Which Is Better?
The single most impactful upgrade you can make is to the infotainment system—it’s the brain of your car’s tech. The debate often comes down to two paths: a fully integrated new head unit or a simpler, stand-alone screen that adds Apple CarPlay or Android Auto. While stand-alone screens are cheaper and easier to install, they are a compromise. They offer limited integration, often relying on Bluetooth or an FM transmitter for audio, which can’t match the quality of a hard-wired system.
A full head unit replacement, on the other hand, is a game-changer. This involves removing your old factory stereo and installing a modern, feature-rich unit in its place. The benefits are massive: seamless integration with your car’s steering wheel controls, superior sound quality, and a clean, factory-installed look. It provides that « OEM+ feel » we’re aiming for. For example, Car and Driver’s project to modernize a 2004 Land Rover Discovery with an Alpine head unit brought a 9.0-inch touchscreen, Android Auto, Apple CarPlay, and HD radio into a nearly two-decade-old vehicle, completely transforming the driving experience.
The choice ultimately depends on your budget and goals. For a truly modern feel, investing in a proper head unit is the way to go. For those on a tighter budget, a stand-alone screen is a viable first step, but understand its limitations.
| Feature | Integrated Head Unit | Stand-alone Screen |
|---|---|---|
| Installation Complexity | Requires dashboard modification | Simple mount installation |
| Price Range (CAD) | $400-1,500 | $150-500 |
| Integration | Full vehicle system integration | Limited/Bluetooth only |
| Cold Weather Performance | OEM-grade components | Variable reliability |
| Warranty | 1-2 years typical | 6 months-1 year |
How $200 of Insulation Can Make Your Economy Car Feel Like a Luxury Sedan?
One of my favourite and most underrated upgrades has nothing to do with electronics. It’s about sound. You might not realize it, but a huge part of what makes a luxury car feel « premium » is how quiet it is inside. Your 2010 economy car likely has minimal sound deadening from the factory, which means a lot of road, wind, and engine noise gets into the cabin. For about $200 in materials and a weekend of your time, you can dramatically change the entire feel of your ride.
Using sound deadening material like Dynamat or Kilmat on key areas of your car’s body panels reduces vibrations and blocks exterior noise. The difference is night and day. Your music will sound richer and clearer because the « noise floor » of the cabin is lower, and conversations will be easier. It makes the car feel more solid, substantial, and refined—just like a luxury vehicle. This is a perfect example of a high-impact, value-driven modernization.
The key is strategic application. You don’t need to cover every square inch. Focusing on the highest-impact areas will give you the best results for your investment. This is a satisfying DIY project that delivers a tangible improvement every time you get behind the wheel.
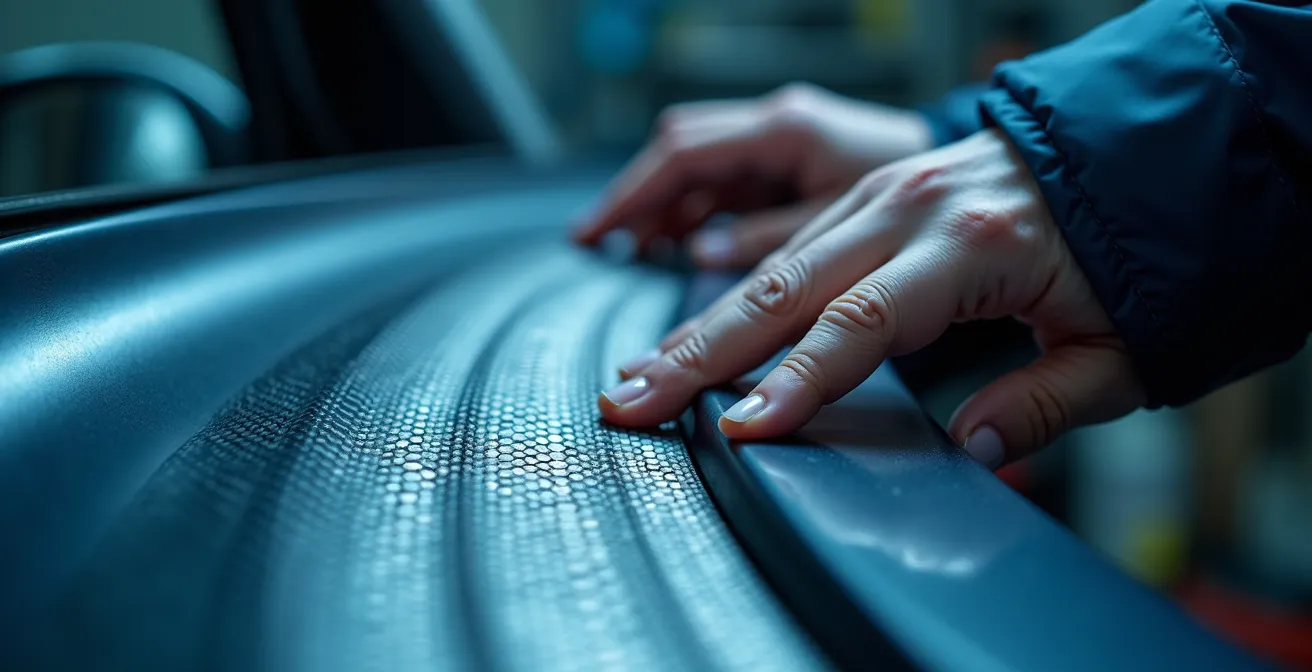
As you can see, the material is applied directly to the metal to absorb resonance. The most effective approach is a methodical one, tackling the main sources of noise one by one for a comprehensive result.
Your Action Plan: Strategic Sound Deadening
- Start with door panels: Remove interior panels and apply sound deadening material to the inner door skin to reduce road noise and improve speaker performance.
- Target the firewall: Apply material to the firewall area from inside the cabin to significantly reduce engine noise penetration.
- Apply to floor pans: Focus on the floor, especially over the wheel wells, to combat tire and road noise.
- Address the trunk area: Don’t forget the trunk floor and spare tire well to cut down on road noise coming from the rear of the vehicle.
- Consider the roof: For the ultimate quiet cabin, especially in vehicles prone to wind noise or in extreme climates, applying material to the roof panel makes a big difference.
When Is It Illegal to Put LED Bulbs in Halogen Reflector Housings?
This is a big one, and there’s a lot of misinformation out there. You want better, brighter headlights, and you see countless « plug-and-play » LED bulb kits online promising a modern look. Here is the hard truth: in Canada, putting an LED bulb into a headlight housing that was designed for a halogen bulb is illegal for on-road use. It’s not a grey area; it’s a direct violation of safety standards.
The issue isn’t the LED bulb itself; it’s the halogen reflector housing. These housings are engineered with incredible precision to reflect light from a tiny, specific halogen filament to create a controlled beam pattern with a sharp cutoff. This prevents you from blinding oncoming drivers. An LED bulb has a completely different light source shape and size. When you put it in a reflector housing, it scatters light everywhere, creating dangerous glare for others and often providing worse actual road illumination for you, despite seeming « brighter. »
Transport Canada is very clear on this matter, as their standards dictate the specific performance requirements for all vehicle lighting. As they state regarding these conversions:
LED bulbs in halogen reflector housings fail to meet CMVSS 108 standards and are illegal for on-road use in Canada
– Transport Canada, Canadian Motor Vehicle Safety Standards
The legal and safe alternatives are to either use high-performance halogen bulbs, which offer a noticeable improvement, or to replace the entire headlight assembly with a properly engineered projector-style housing designed specifically for LED or HID bulbs. This is a safety-first upgrade where sticking to the rules is non-negotiable.
Can You Safely Swap a Steering Wheel Without Disabling the Airbag?
Absolutely not. There are zero exceptions to this rule. Your car’s airbag is an explosive device, and attempting to work on or around it without following proper safety procedures is incredibly dangerous. An accidental deployment can cause serious injury. Many DIY enthusiasts see a cool aftermarket steering wheel and think it’s a simple cosmetic swap, but they overlook the complex system they are tampering with.
The process of swapping a steering wheel involves much more than just a few bolts. The supplemental restraint system (SRS), which includes the airbags, is controlled by a sensitive electronic module and powered by capacitors that can hold a charge even after the car’s battery is disconnected. This is a critical detail that many people miss.
As a professional, this is one area where I never cut corners. The risk is simply too high, not just for personal injury but also for future liability. A tampered or improperly installed airbag can fail to deploy in an accident, or deploy when it shouldn’t. This can lead to insurance claim denials and devastating consequences.
It is NOT safe to swap a steering wheel without properly disabling the airbag system. You must disconnect the battery and wait for capacitors to discharge – a critical step often overlooked that can result in serious injury or void insurance claims
– Professional Mechanic Warning
If you dislike the look or feel of your old steering wheel, there are much safer alternatives. Consider a professional leather re-wrapping service to refresh its appearance, or add high-quality covers for improved grip. If a full replacement is the only option you’ll consider, this is a job that should be left to a qualified professional who understands the SRS.
Plug-and-Play vs Wire Splicing: Which Remote Starter Is Safer?
A remote starter is practically a necessity for surviving a Canadian winter. But not all installations are created equal. You’ll find two main types of kits: « plug-and-play » T-harness systems and traditional wire-spliced systems. Plug-and-play kits are marketed as easy, DIY-friendly solutions. While they can work, from an installer’s perspective, they introduce potential points of failure, especially in our harsh climate.
A traditional, professional installation involves carefully splicing and soldering the remote starter’s wires into your vehicle’s factory wiring harness. Why is this better? It creates a permanent, robust connection that is far more resistant to vibrations and, crucially, corrosion. In Canada, road salt and moisture are relentless enemies of electrical connections. A poorly seated plug-and-play connector can fail over time, leaving you stranded. A soldered connection, when done correctly and properly sealed, is a lifetime connection.
Canadian Remote Starter Installation Best Practices
Professional installers in Canada overwhelmingly recommend wire-spliced connections with proper soldering for maximum durability against road salt corrosion and vibrations from brutal winter driving. Top-tier brands like iDatalink, Compustar, and Fortin are known for their reliability in Canadian winters, with certified installation available at national retailers like Visions Electronics, ensuring the system is « Canadian-proofed. »
This is a perfect example of where paying for professional installation adds significant long-term value and peace of mind. The slightly higher upfront cost is an investment in reliability when you need it most—on a -30°C morning.
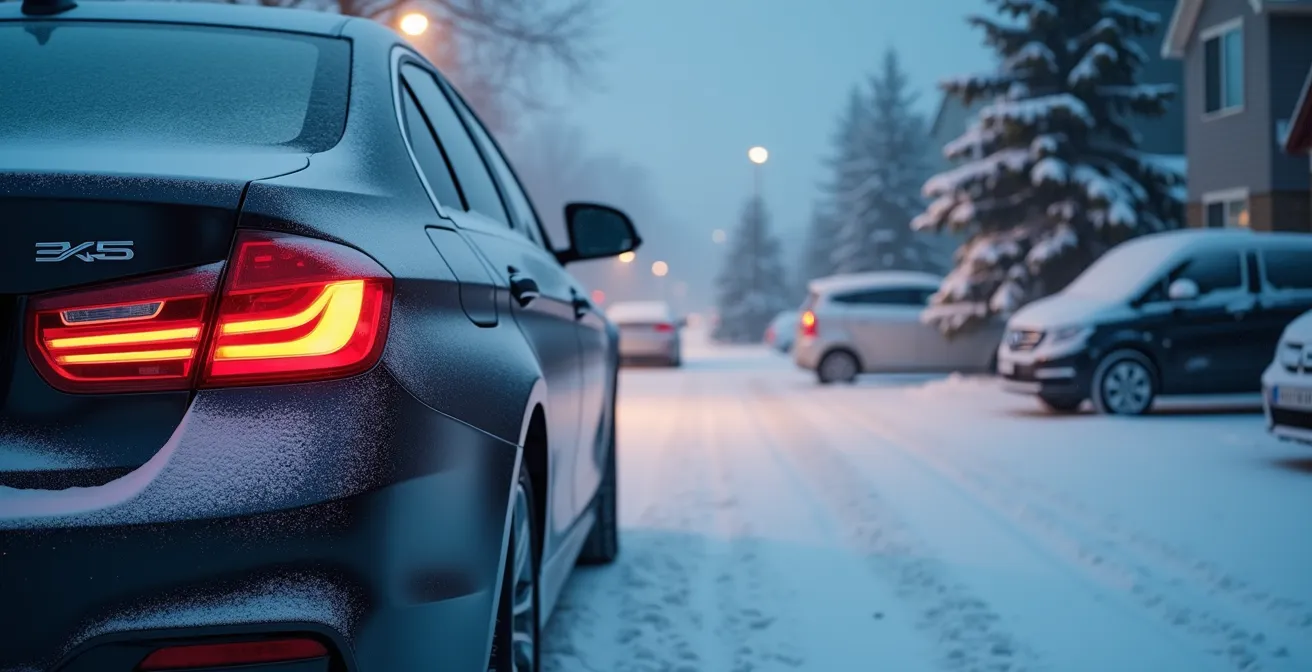
A remote starter is about more than comfort; it’s about reliability. Ensuring the system is robust enough for a Canadian winter means choosing an installation method that prioritizes durability over convenience.
Why Insuring a 10-Year-Old Civic Can Cost More Than a New SUV?
This is a frustrating reality for many Canadian owners of older, popular cars like the Honda Civic or CR-V. You’d think that a decade-old car with a lower replacement value would be cheaper to insure, but that’s often not the case. The reason comes down to one major factor: theft rates. For years, older models of the Honda Civic have been among the most stolen vehicles in Canada, particularly in provinces like Ontario. Their popularity means a high demand for parts, and older ignition systems are often easier to bypass.
Insurance companies base their premiums on risk, and a high theft rate means high risk. They aren’t just insuring the car’s value; they’re insuring the likelihood that they’ll have to pay out a claim. Auto theft has become a national crisis, and the financial impact is staggering. According to the Insurance Bureau of Canada, the value of insurance claims for auto theft hit $1.5 billion for the first time ever in 2023. This cost is passed on to consumers through higher premiums, especially for high-target vehicles, regardless of their age.
The good news is that you can take concrete steps to lower this risk and potentially your premiums. Informing your insurer about security upgrades is key. Here are some of the most effective measures:
- Install a certified anti-theft system, such as the Tag tracking system which is widely recognized in Quebec.
- Use a highly visible steering wheel lock as a physical and visual deterrent.
- Protect your keyless entry fobs from relay attacks by storing them in a Faraday box or bag.
- Park in a locked garage whenever possible, as opposed to on the street or in an open driveway.
- Always inform your insurer about any security upgrades you’ve made, as many offer discounts for them.
Decibel Limits: How Police Are Testing Loud Exhausts in Cities?
If you’re considering an aftermarket exhaust for your car, you need to be aware of the increasing crackdown on vehicle noise in Canadian cities. While a throatier exhaust note can be part of the fun of car ownership, excessively loud systems are a major source of public complaints, and municipalities are responding with stricter enforcement and new technology. It’s no longer just about an officer’s subjective opinion.
Cities are now implementing objective, technology-based enforcement. This includes using certified decibel meters during traffic stops to measure the exact sound level of an exhaust at a specific RPM, typically as outlined in provincial traffic acts or municipal bylaws. If your vehicle exceeds the legal limit (which varies by jurisdiction), you can face hefty fines and an order to have the vehicle repaired.
Furthermore, some jurisdictions are taking it a step further. According to a report on classic car modernization, cities like Edmonton have implemented strict enforcement with fines up to $1,000 and are testing automated « noise cameras. » These devices work like photo radar for speeders; a microphone array detects a vehicle exceeding the decibel limit and a camera captures the license plate to automatically issue a ticket. This technology is making it easier than ever for police to enforce noise bylaws 24/7. Before investing in a loud exhaust, it’s critical to check your local municipal bylaws and provincial regulations to avoid unwanted attention and expensive fines.
Key Takeaways
- True modernization comes from seamless system integration, not just adding standalone gadgets.
- Prioritize safety and legality, especially with critical systems like headlights and airbags, by adhering to Canadian Motor Vehicle Safety Standards (CMVSS).
- Focus on « Canadian-proofing » your upgrades by choosing components and installation methods that withstand extreme cold, moisture, and road salt.
SpotAngels vs GreenP: Which App Prevents More Tickets?
In the urban jungle of a major Canadian city, the final piece of modern tech isn’t in your car—it’s on your phone. Parking tickets are a costly and frustrating reality, and the right app can be your best defense. The debate often centers on official city apps versus third-party solutions. In Toronto, for example, this means comparing the official GreenP app with a crowdsourced app like SpotAngels.
The official city app (like GreenP in Toronto or PayByPhone in Vancouver and Calgary) is essential for one primary reason: it’s the payment processor. You must use it to pay for your parking sessions, and it provides the digital receipt that is your ultimate proof of payment. It’s non-negotiable for transactions.
However, third-party apps like SpotAngels serve a different, complementary purpose. They excel at discovery. Using crowdsourced data, they can help you find free parking spots, alert you to street cleaning rules, and remind you when your meter is about to expire, even if you paid through the official app. They are a situational awareness tool. Therefore, the question isn’t « which one is better, » but « how do you use them together? » The best strategy is a two-app approach: use the official app for all payments and the third-party app as a powerful reminder and discovery tool to avoid getting a ticket in the first place.
| City | Official App | Best Feature | Alternative Apps |
|---|---|---|---|
| Toronto | GreenP | Official TPA payments | SpotAngels |
| Vancouver | PayByPhone | Zone-based payments | SpotHero |
| Montreal | P Service Mobile | Multi-zone support | Waze |
| Calgary | PayByPhone | ParkPlus integration | SpotAngels |
Ultimately, the app that prevents the most tickets is the one you use consistently. A combination of official payment and smart reminders is the most effective strategy for any Canadian city driver.
To successfully bring your trusted vehicle into the modern era, the next logical step is to map out a clear plan. Prioritize the upgrades that will provide you with the most daily value and safety, and always budget for professional installation on critical systems.
Frequently Asked Questions About Modernizing Your Car
Can I install LED bulbs in my older car’s halogen housings?
No, it’s illegal in Canada as they don’t meet CMVSS 108 standards and create dangerous glare patterns for oncoming traffic.
What are the legal alternatives for better lighting?
p>
You can use high-performance halogen bulbs like Philips X-tremeVision or, for a more significant upgrade, invest in complete projector housing conversions that are designed for LEDs and meet safety standards.
What are the consequences of illegal LED conversions?
The consequences can be severe, including failing provincial safety inspections, receiving fines, potential stunt driving charges in some areas, and even having an insurance claim denied in the event of an accident.